dreamcatchers &
air plants
According to Native American lore, dreams, both good and bad, surround us as we sleep. Nightmares are tangled in the dreamcatchers web while the good dreams slip down the hanging feathers and on to us as we sleep. Dreamcatchers enhanced with air plants deliver peace and tranquility both day and night.
This post may contain affiliate links, and I love all the products I promote.
3 Styles
Although there are about a bazillion ways to create a dreamcatcher, we’ll go through 3 different styles: boho, traditional and shabby chic. The 1st is made a with a stick and a necklace, the 2nd is a created with a traditional woven center, the 3rd uses a purchased doily.
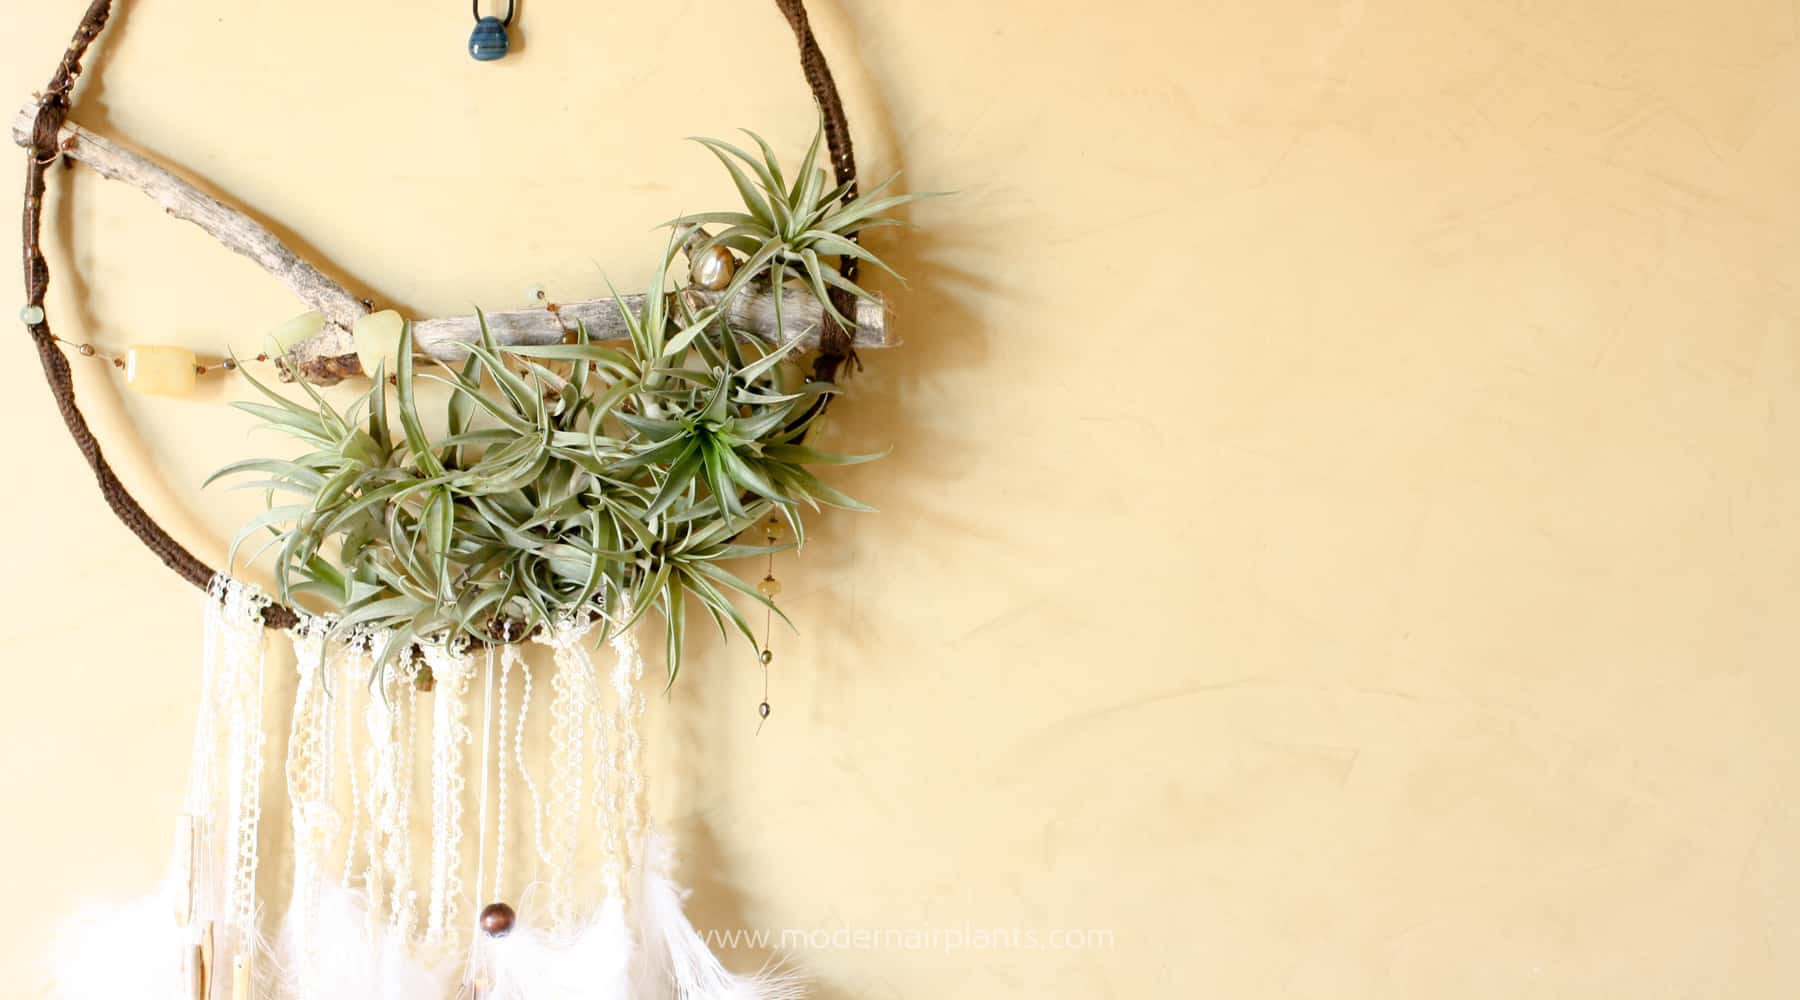
Stick and Necklace Boho Style
Supplies
- metal macrame hoop, about 12″
- a stick about 12″ long, just a bit longer than the width of the hoop
- a beaded necklace, one with knots between the beads so that the whole thing doesn’t come apart when you cut it.
- yarn to go around the edge of the hoop
- crochet hook, optional. I used size G, or 4.0 mm
- 2 yards of 5 different ribbons or trims
- yarn or ribbon to wrap hoop
- feathers
- wood beads with a large opening
- large, blunt embroidery needle
- glue and hot glue gun
- sharp sewing scissors
- air plants, I used about 10 small harrisii
- floral glue, optional
- pendant, or special bead. I’m using a polished rock with a hole through it.
Directions
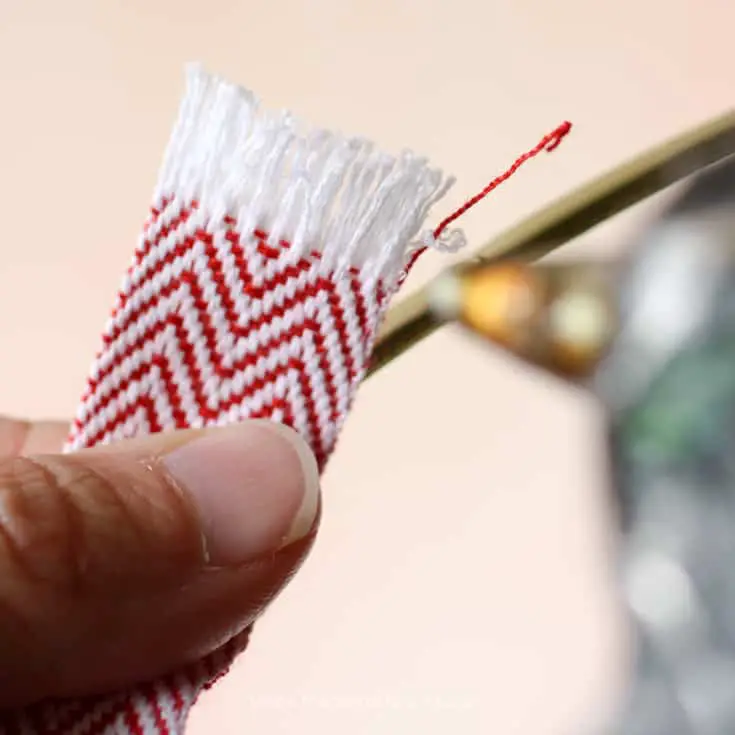
Cover the hoop with yarn. You can wrap yarn around the hoop, or you can cover it like it did, crocheting around the hoop.
crochet around hoop video tutorial`

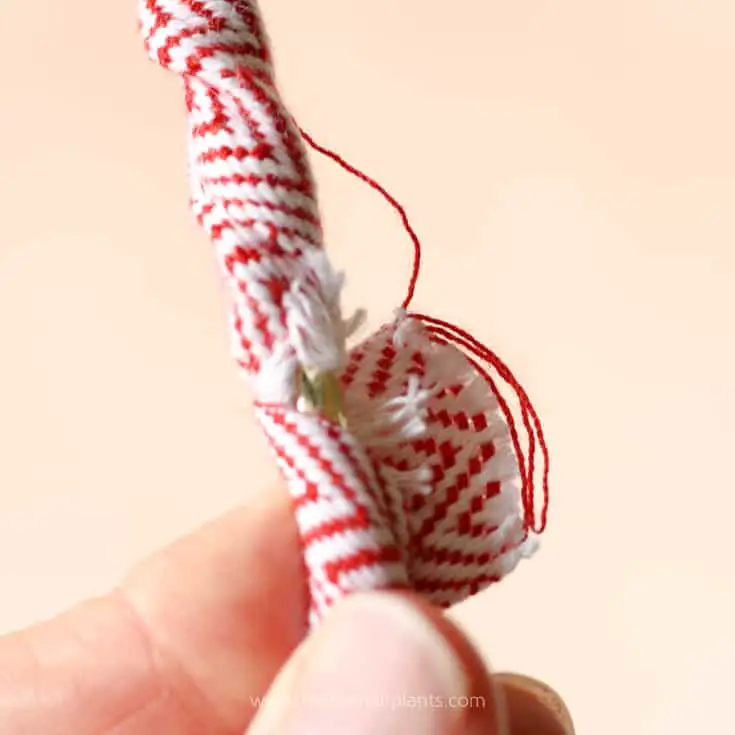
Lash the stick to the hoop, using the same yarn that you did to cover the hoop. Wrap the yarn around the stick and secure the yarn with a square knot.
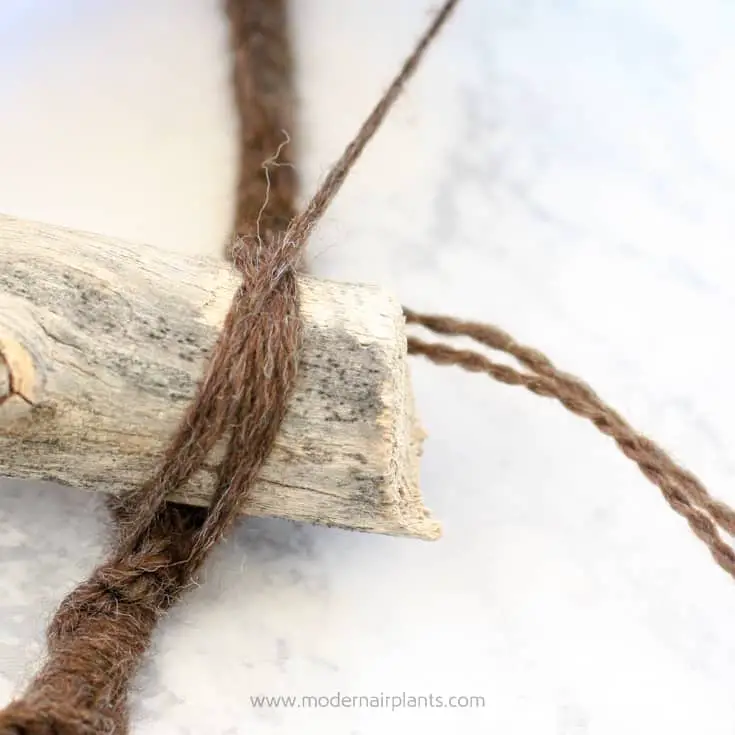
Wrap the yarn under the hoop and around the stick in an X pattern.
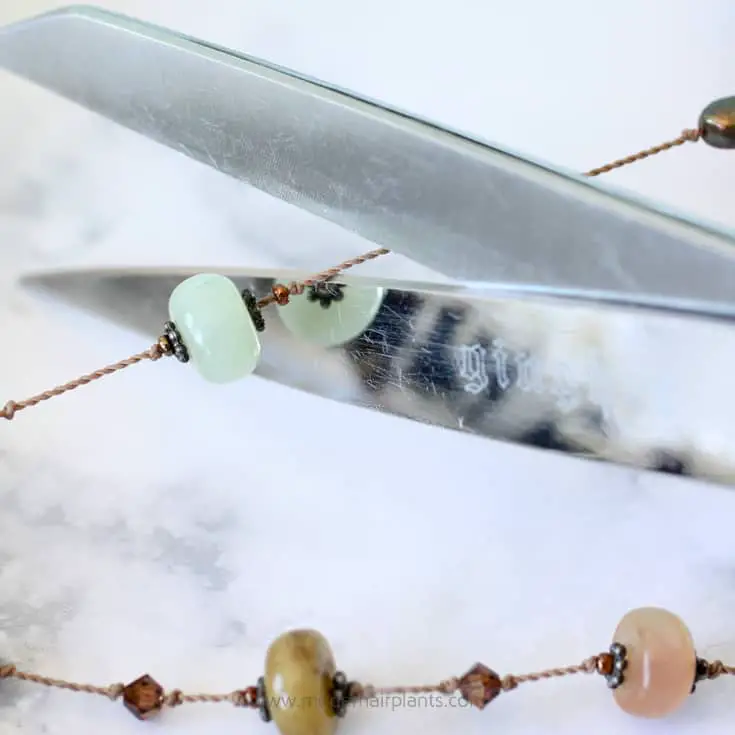
Cut the necklace so that it is one long string. To keep beads from flying off the string, use a necklace that is knotted between beads.
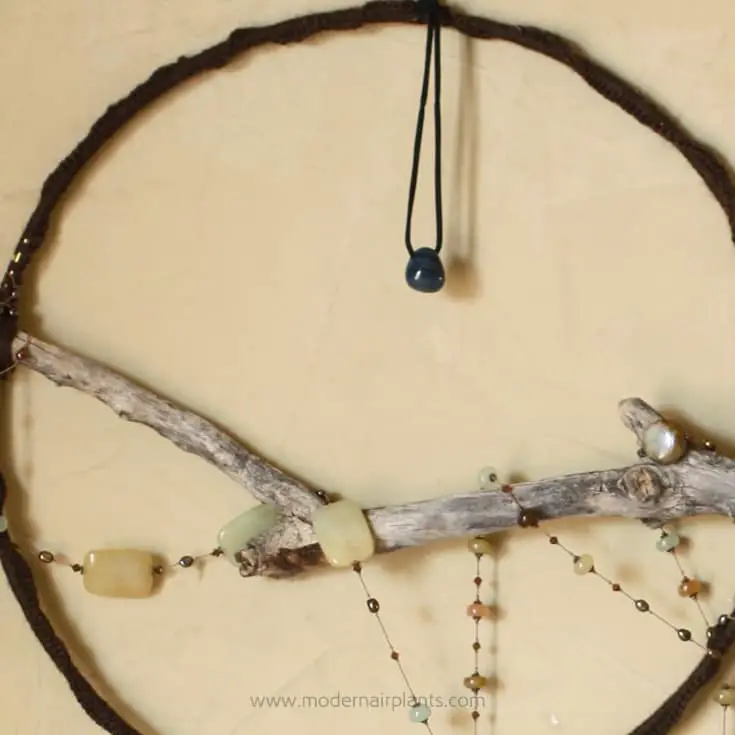
Then wrap the necklace between the stick and the lower half of the loop.
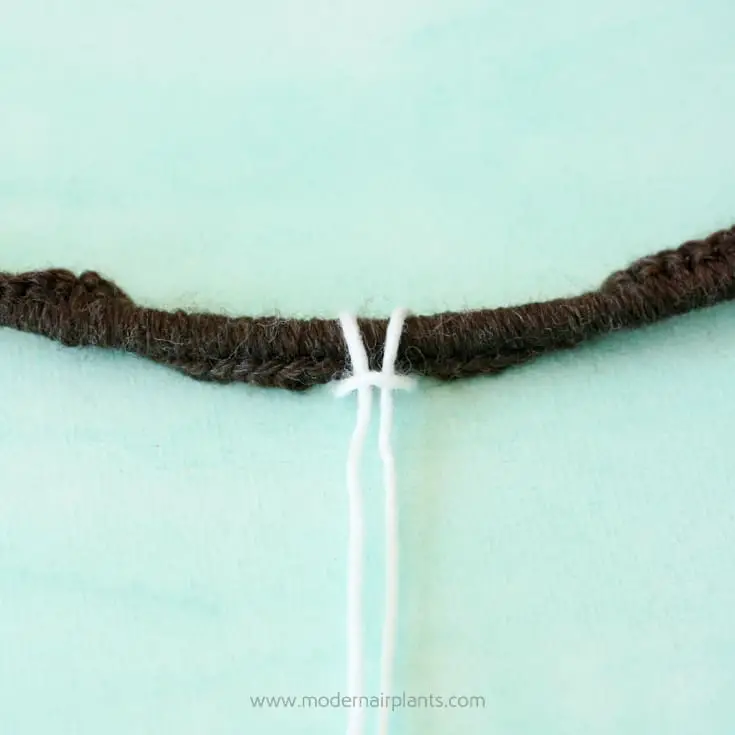
Determine the length of the desired trim and cut it double your desired length. Fold the trim in half and loop over the hoop.
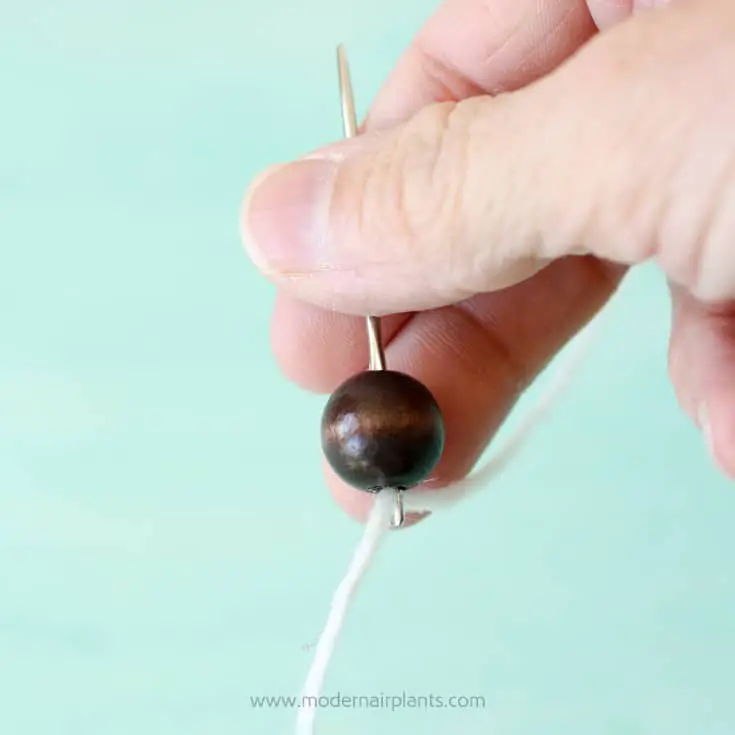
Using a blunt embroidery needle, slide beads on to the trim.
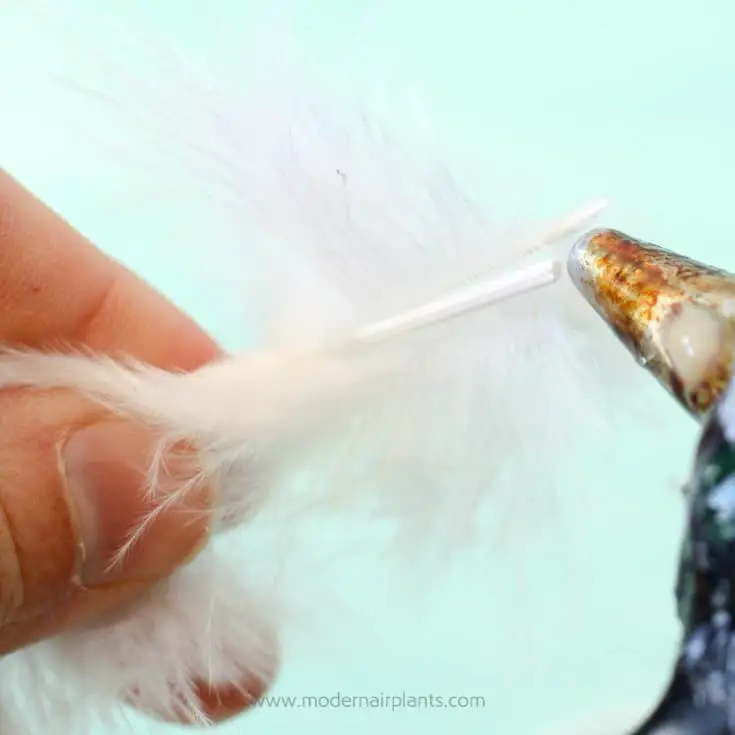
Take about 3 feathers with their ends together add a bit of hot glue to the tips.
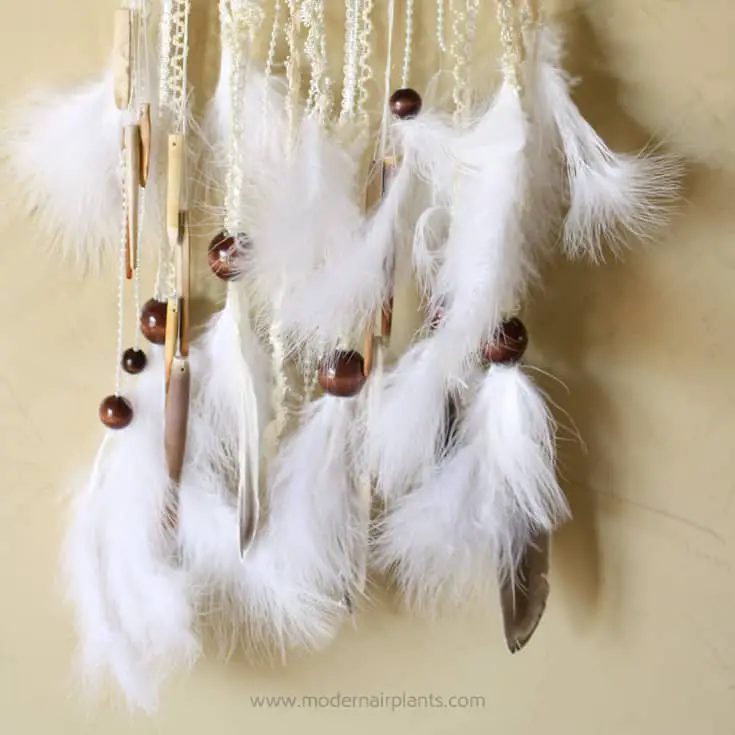
Just for fun, I’ve also added rocks from a wind-chime.
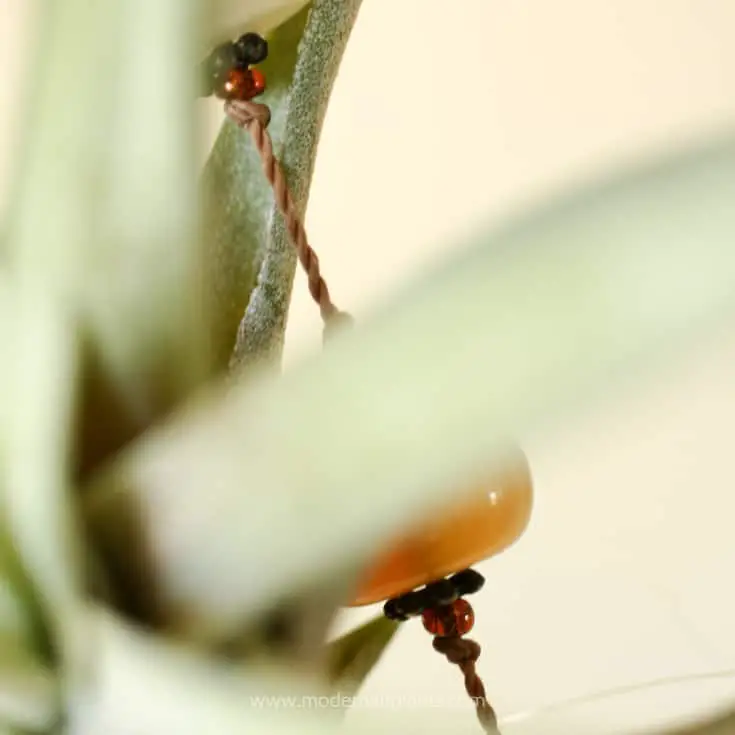
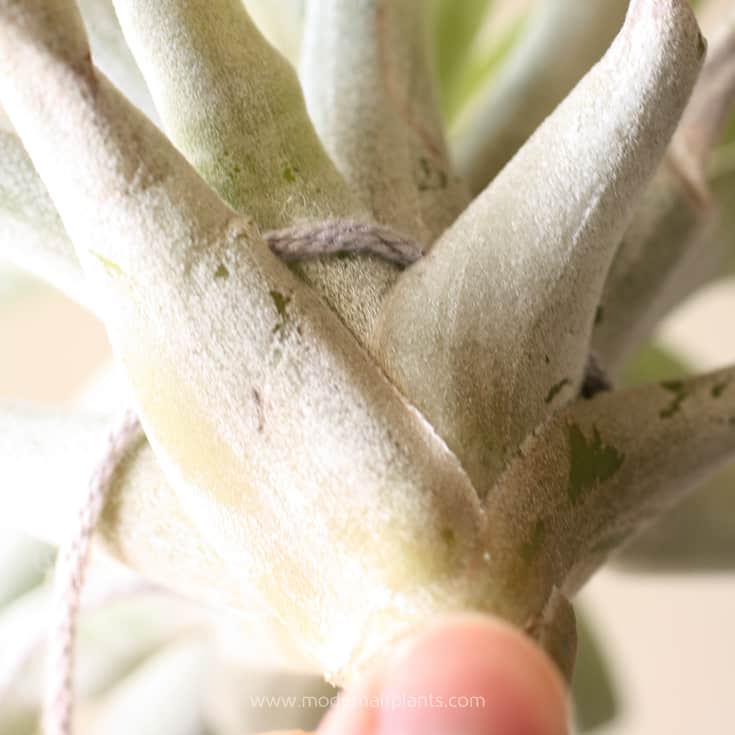
Now for the air plants, nestle the air plants into twig and strand of beads. To secure the plants, you can glue them into place. Or, simply tuck necklace behind air plant leaves.
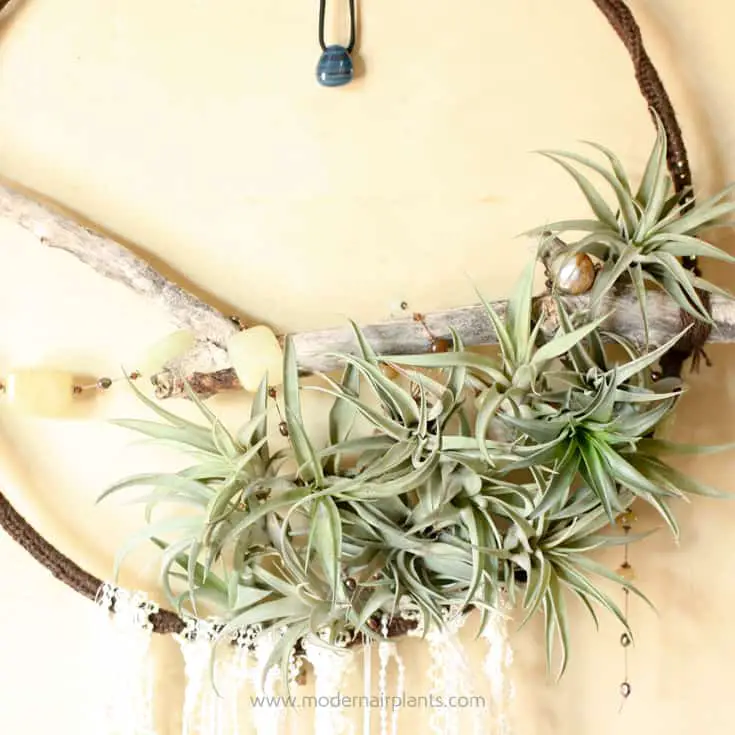
Play around with the air plants and the necklace until the air plants are secure. Shown are T. harrisii. If desired, tie a pendant to hang from the top. In this case, I’m using a polished blue rock.
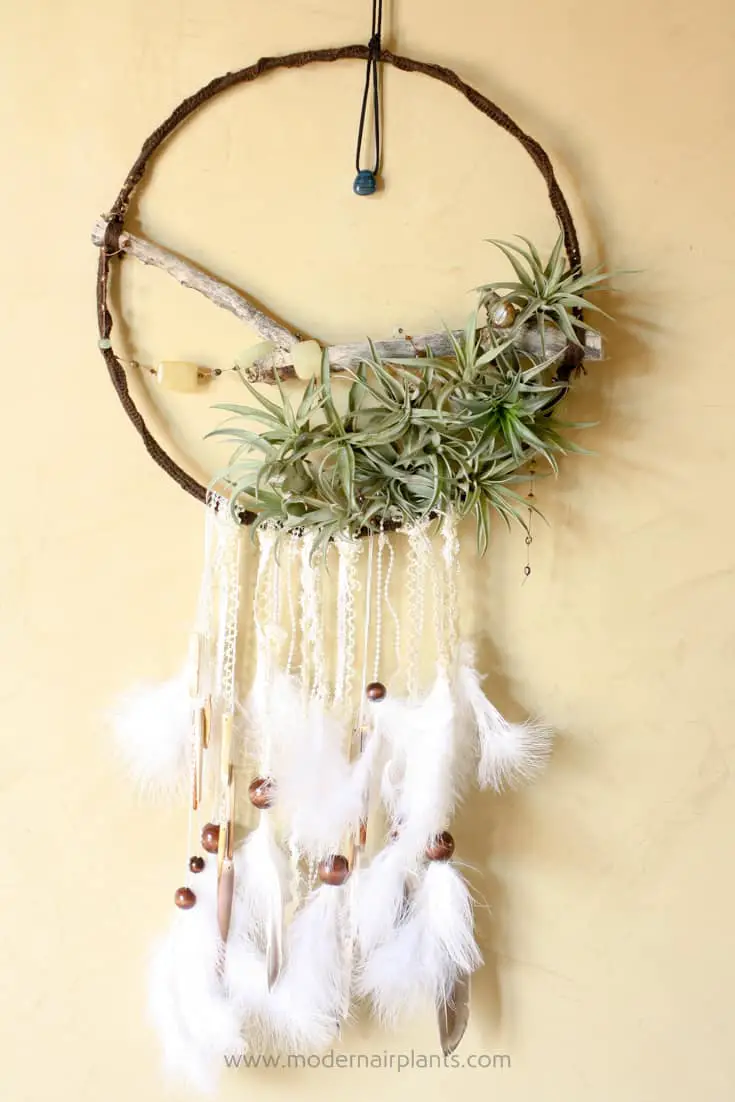
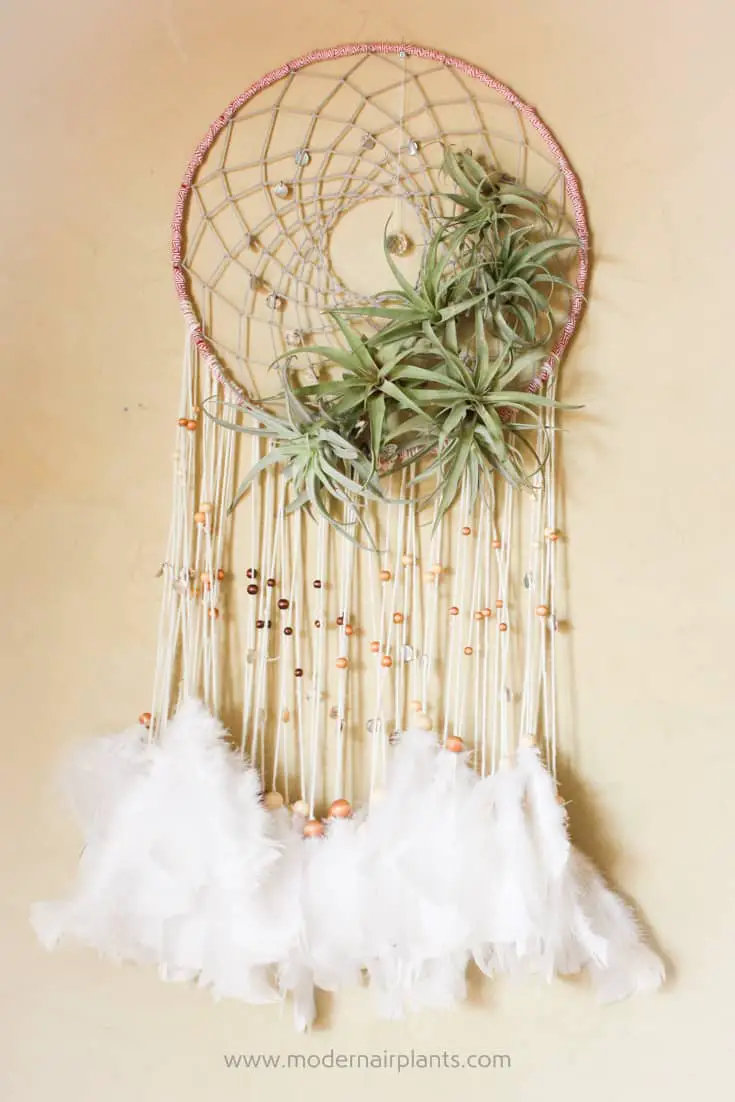
All finished: a boho style dreamcatcher.
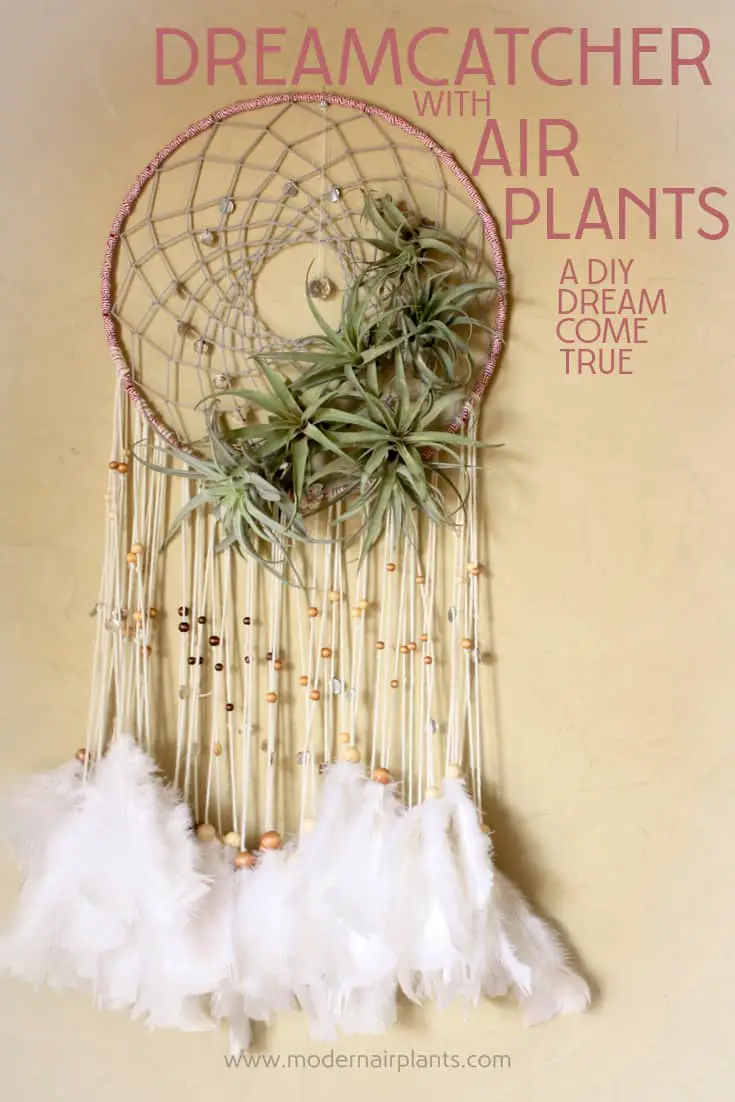
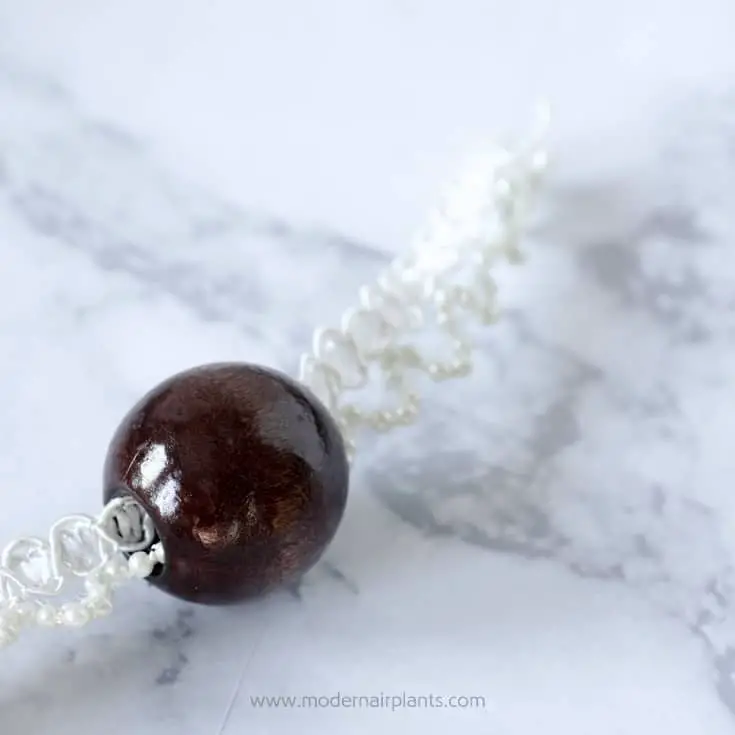
Traditional Style Dreamcatcher
Supplies
- macrame hoop, about 12″
- ribbon to go around the edge of the hoop
- yarn to weave hoop center and to hang feathers from, cotton yarn works best to weave “web” because cotton doesn’t stretch
- feathers
- wooden beads with a large opening
- glue and a hot glue gun
- sharp sewing scissors
- air plants, I used 6 peach capitata
- floral glue, optional
- pendant, or special bead. I’m using a prism
Directions
Add a dab of hot glue to the metal ring to attach the ribbon to the ring. Then wrap the ribbon around the ring.
When the ring is completely covered with the ribbon, add a bit of glue to the end of the ribbon to secure the ribbon.
To learn how to weave the dreamcatcher, I followed watched this video. It’s kind of long, but it walked me through the whole process.
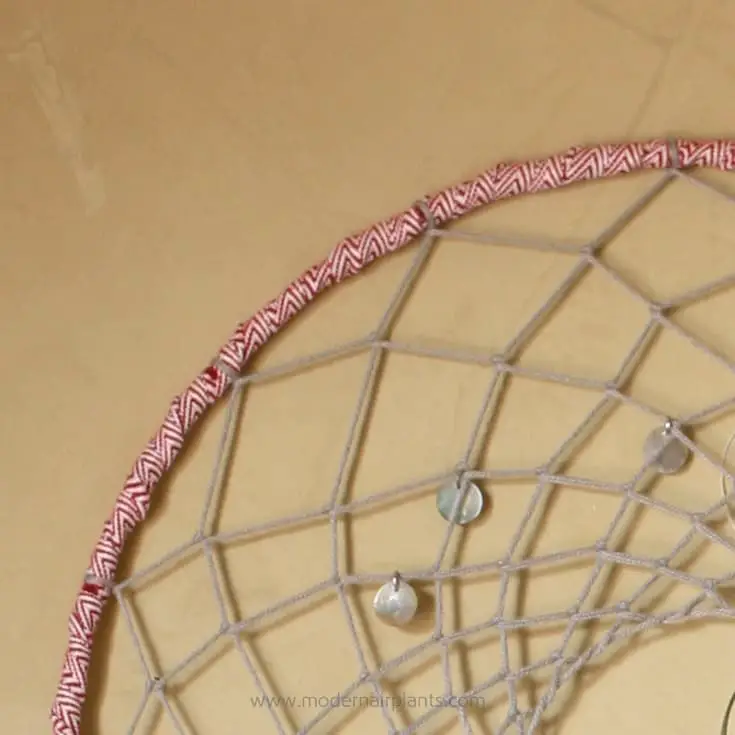
Traditional woven dreamcatcher embellished with shells.
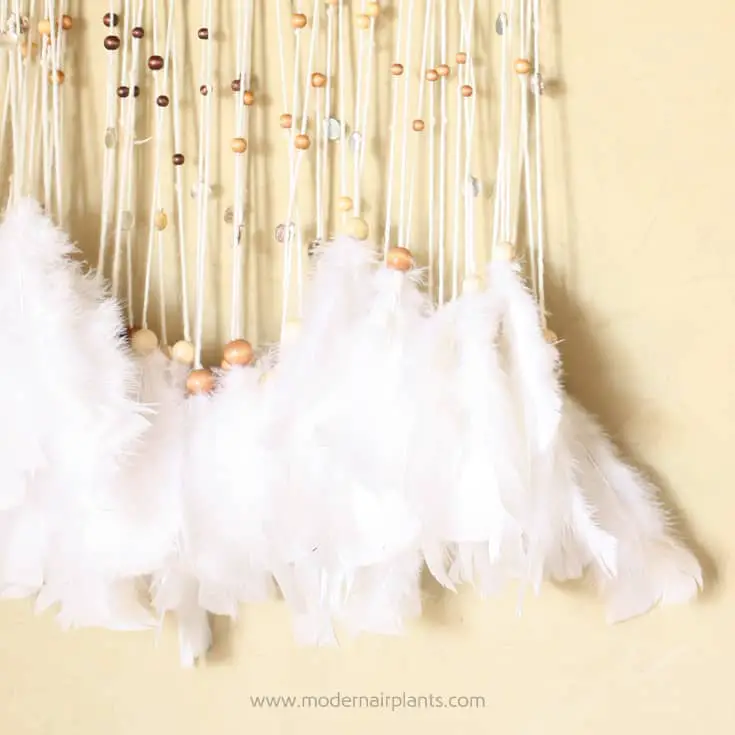
Cut yarn double the desired length of the yarn and slip yarn over the hoop tying it to the hoop. Using an embroidery needle, slide beads on to the yarn. To fix the placement of the bead, tie a know so that the bead cannot slide past the knot. As described above, add a bead of hot glue to the end of 3 feathers, then press the feathers against the end of a piece of yarn. Next, slide a bead over the end of the feathers.
Loop yarn around the lower leaves of the air plant then tie to the dreamcatcher. This is easier said than done. You will have to play around with the yarn and air plants to get it right. Also, it’s a lot easier if the dreamcatcher is lying down on a table rather than trying to attach the air plants while it’s hanging on the wall.
Air plants with a traditional dreamcatcher.
Shabby Chic Dreamcatcher
Supplies
- 12″ hoop, embroidery hoop
- purchased lace doily, a few inches larger than the hoop
- ribbon and/or trim to go around the edge of the hoop
- 2 yards of 5 different ribbons and/or trims
- feathers
- wood beads with a large opening
- large, blunt embroidery needle for threading beads
- glue and a hot glue gun
- sharp sewing scissors
- Air plants, I used 5 large green abditas
Directions
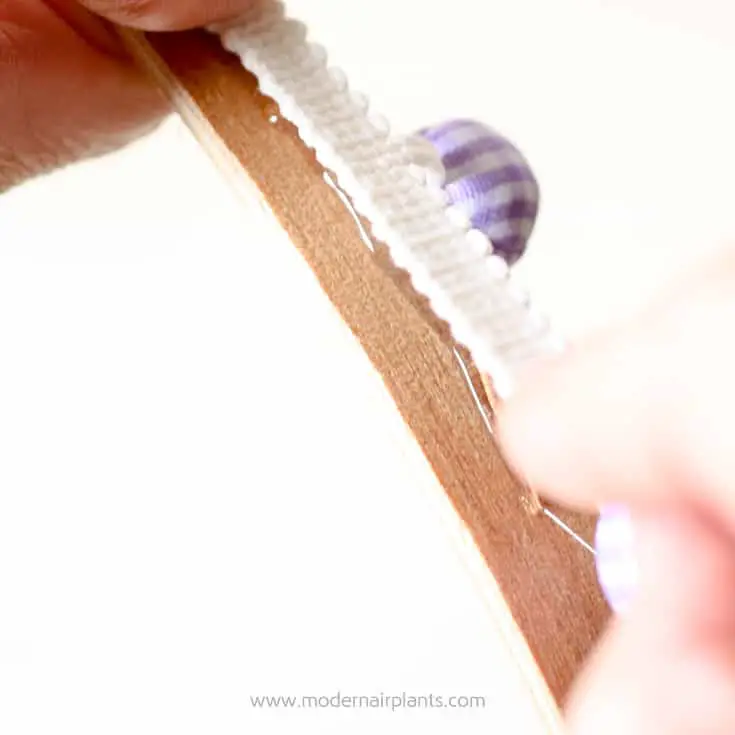
Begin by hot gluing trim around the outside edge of the outside hoop.
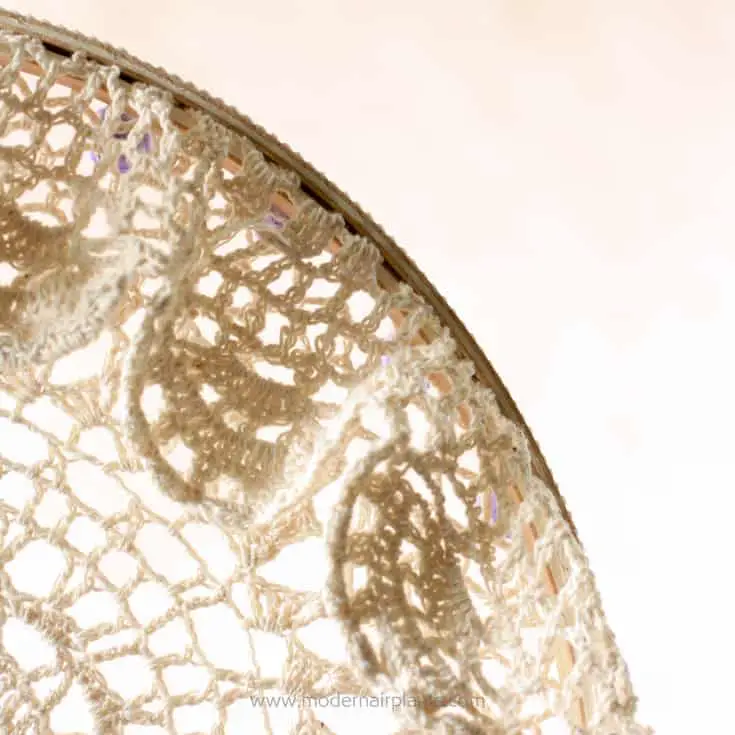
Place doily in the hoop. Tighten the screw and pull doily tight.

Using a sharp pair of scissors, trim away the excess doily and glue in place.
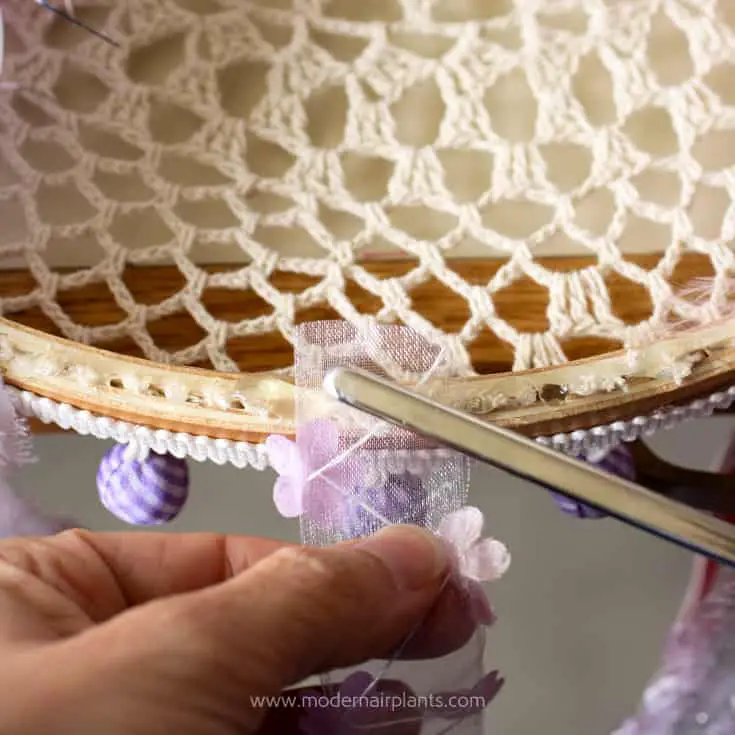
Cut trim and glue in place. To avoid getting burned you can use a pencil or chopstick to press the ribbon into the hot glue.
String beads onto ribbons.

Apply a dot of hot glue to end of feathers. Push feathers inside the bead at the end of the ribbon.
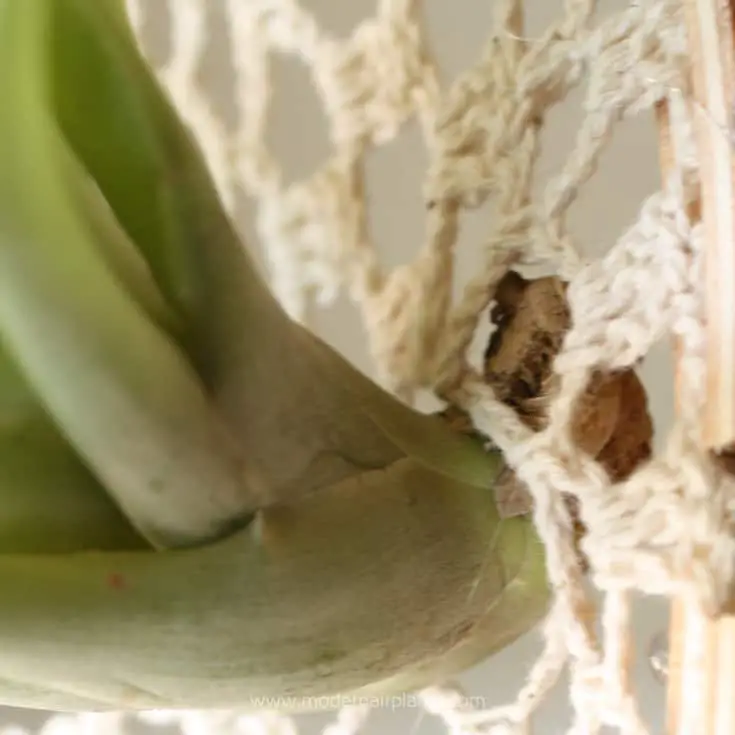
Place air plants into a hole in the doily.
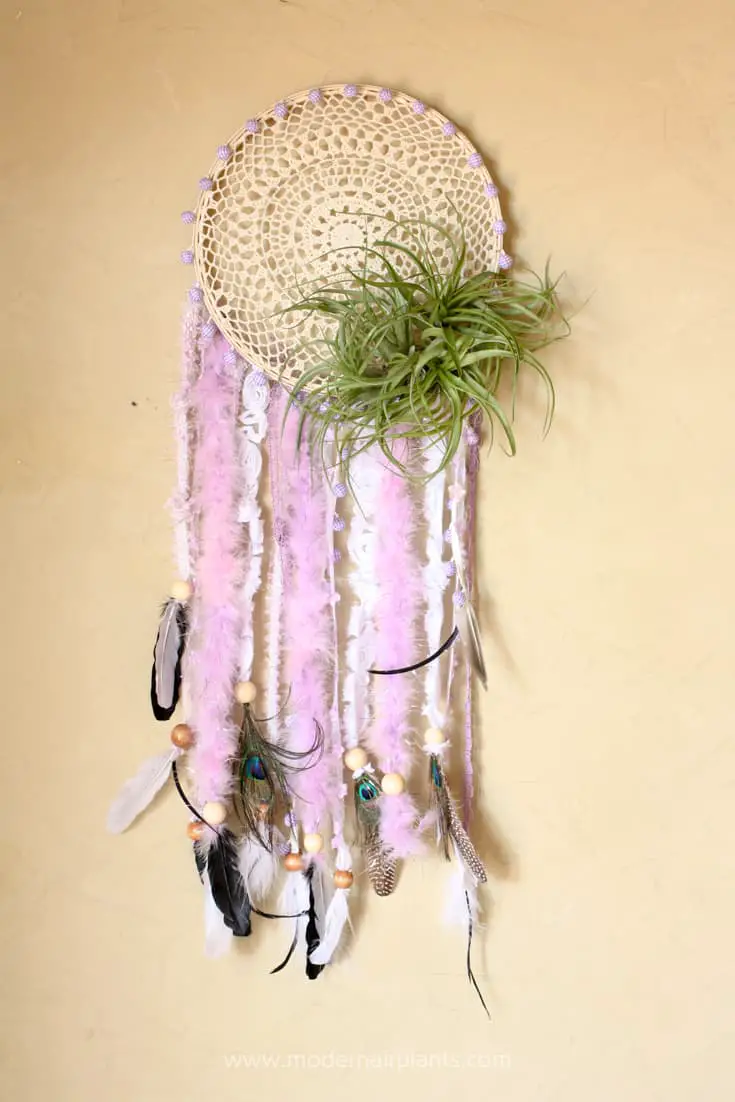
Air plants and shabby chic dreamcatcher with a doily
Your Turn
My hope that that one of these three, or a combination of these styles, will inspire you to create your own dreamcatcher–with air plants.
CLICK HERE TO LEARN MORE ABOUT AIR PLANTS